At casa del Howell
The best laid plans, and all that – just as well I don’t
rely too much on plans as over the last few weeks a lot has changed. Firstly,
my impending redundancy has been moved back to June 2021, giving me a further 6
months of work, it has meant moving jobs but still with the same employer, I’ll
just finish a little later than planned.
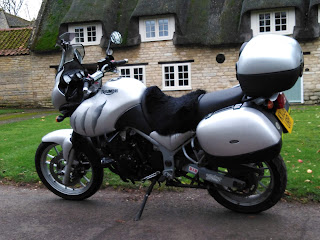
Tallulah
A week after lockdown, I managed to get out on the bike for VRUK (Volunteer Riders UK) which didn’t exactly go to plan. I was due to meet my contact at Cambridge services on the A14 so set off in good time and dry sunny weather for a nice relaxed ride down to pick up three large plastic wrapped bags of scrubs which were on their way to a small village just west of Grimsby. That’s where things started to go wrong. Shortly after I got to Cambridge services, I received a message that Alan, my contact had in his words, dropped his bike. A little later we spoke on the phone and he asked me to ride to him so he could hand over the scrubs to me. He was in a Waitrose carpark in South Cambridge somewhere, about 20 miles further south of my location.
By the time I got there, moved his Harley a couple of hundred yards to safety and loaded up my Tiger, the ambulance had arrived. Turns out his ‘drop’ had broken his leg and ankle. I think I was two hours late to my drop off point in Grantham but luckily, my contact was aware of what had happened so waited for me in a nearby McDonalds.
This was the first time I’d had Tallulah out for a long run
since rebuilding the brakes and the first 100+ mile run for almost 3 months. It
felt good to get out for a run and I’ve since been out for another 100+ mile
run, just because I can. It seems that in this lockdown, riding bikes for
recreation is allowed as long as you don’t meet up with anyone, so that’s good.
Tabitha
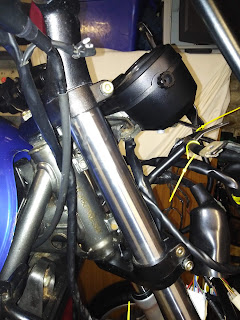
Forks
I’ve spent a good weekend in the garage working on Tabitha and can see the end is in sight. The first items to come back were the fork stanchions from Dynasurf. Putting the forks back together was almost straightforward and would have been finished in a couple of hours if I’d had enough fork oil. I ordered some from Opie Oils, taking advantage of 5% discount from my Triumph Motorcycle Owners Club (TOMCC) membership. I’d done some research online and in the workshop manual to find out how much I needed but all I could find was what the air gap was with the fork fully compressed and with the spring removed (10.5mm) but nowhere could I find the volume needed. I knew the Tiger took just over 1L but a check on the owner’s forums suggested it was less. So, I ordered 1L together with 5L engine oil. Turns out each fork took approximately 600ml so I had to wait while another 1L was ordered and delivered from Sportsbikeshop in Boston. Aside from that, they went back on the bike without drama.
Before and after photos
While I was waiting, I received a message from Ben at BJM to
say my carbs were ready. When I was told the cost, I was gobsmacked. I knew he
had to order a new cap, have an emulsion tube made up, replace a few seals and
I’d also asked him to order a brake lever pivot bolt. I was expecting a bill of
around £250. All that work, including parts came to £130. Bonus, I still had
£120 in the budget, so I’ve ordered some new brake lines from Wezmoto in
Exeter.
Chain & sprocket
Now things are really moving in the garage. First job was to replace the chain & sprocket. To do this, I had to remove the sprocket cover which, because of Triumph’s designers, meant having to drain the oil from the engine.
The oil filler is incorporated in to the sprocket cover, which is a STUPID design, much like having to remove the carbs to replace the air filter. To get access to all the cover bolts, I had to remove the side stand, which meant having to remove the gear linkage, which meant removing the foot peg, which meant removing one of the engine mounting bolts, which as you’d expect was a pain in the a$$as it was behind the rear suspension unit. WHAT WERE THEY THINKING?
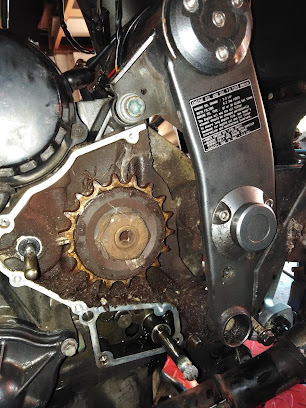
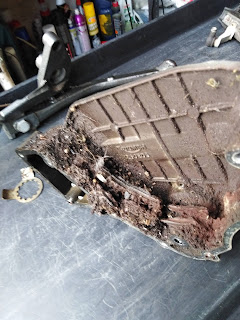
So, oil drained, sprocket cover removed and there in all its
glory was the remains of a very large spider, lots of old congealed oil and
some grease. Now you may recall that I’d cut the old chain off when I was
replacing the rear shock & drag link. I’d also removed the rear sprocket
from the wheel. This was not good as I had no way to loosen the front sprocket
nut. Luckily and despite a recent trip to the recycling centre, I still had the
old chain & sprocket, so I put the sprocket back on the wheel and put it
back on the bike. I also put the chain back on, holding it together with a couple
of cable ties. A piece of wood between the wheel, resting on the swing arm,
locked the rear wheel in place and a rattle gun got the sprocket nut off in
less than 10 seconds. I used the same method to hold the sprocket and rear wheel still when I put the new sprocket on
later.
Clutch
While the oil was drained, I thought I’d look at the clutch. I’d done the hydraulics a while ago, rebuilding the master cylinder and bleeding the system, but the clutch plates were an unknown.
With the bike having done 17,000 miles, I didn’t think the clutch plates would be worn, but they may have been a little sticky because of years of sitting around. I had to order a gasket set for the sprocket cover, so had the foresight to also order a clutch cover gasket at the same time form Spring manufacturing. This was a nice easy job, not like the sprocket cover and the whole job was done in less than an hour. Turns out the clutch plates were in great shape, so a quick clean and a soak in fresh oil before reassembling it was all that was needed.
Carbs
Next to go back on was the carbs. I thought it would be a nice quick job, connect up the throttle cable, the choke cable then ease them on to the rubbers. The first part of the job was easy but trying to get them back on the rubbers was another of those jobs that never goes according to plan. In the end, I was getting a little grumpy after almost an hour of trying, so left them until the following day. To be fair, I had been in the garage for over 8 hours, so probably needed a break anyway.
The next morning, and with an application of some spray
silicon lubricant, the carbs slid into place within 5 minutes. The air box took
a little longer as the rubber seals are oval in shape and, so I found out, if
they’re not positioned correctly, just won’t fit. Again, a quick spray of silicon
and repositioning the rubber seals on the air box and they just slid into
place.
Coolant.
I now had the carbs and air box fitted, the front shocks and
wheel fitted, the clutch done. It was time for the coolant to be replaced.
Shock horror, Triumph actually put drain screws in their 1200 engine., one at
the pump and one half way down the side of the cylinder block – a good bit of
design from them. The whole job took less than half hour. Another one ticked
off the list.
Bodywork
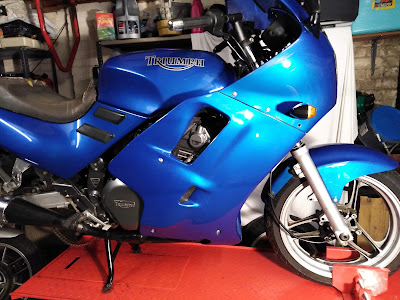
It was time to trial fit the bodywork. Not that I was
expecting it to not fit, but I had a bag full of new bolts and I wanted to see
how it all went together. Besides, I hadn’t really seen Tabitha with her
clothes on, so to speak.
First up, the nose cone and screen. No issues there although
I needed to look at the wiring behind the nosecone to ensure nothing was
catching when I turned the steering. A few adjustments needed but nothing
serious. Next, the rear fairing. This was easy as and was only four bolts. It
did show up one rubber gromet was missing, so I’ll have to order one of those.
Next, the side fairings. Most of the bolts were easy to fix,
but there are also some issues. The fixings under the fairing, that hold the
two halves together have no bolts, or rather the bolts I have don’t fit. The
lower fixing on the front right seems to have been cross threaded at some point
as the bolt won’t do up and on the left side the lower rear fixing also doesn’t
do up. I’ll need to remove the fairings again to sort them out.
Finally, there are plastic trim panels around the front of the steering stem and down to the top of the side panels. There are 6 fixing points and I don’t have any bolts that fit. As the trim panels are black, it probably needs black bolts, so I’ll have to source them as soon as I can work put what size they are. <Much like the bolts that hold the two halves of the fairing together, I don’t have the correct sizes in the fairing bolt kit I purchased.
Among all the little niggly jobs to do, there’s still loads
of big jobs to complete, like putting the brakes back on, replacing the rear
brake disc, tyres and fuel tap and getting the wheels refurbished, so I’m not
there yet, but at least Tabitha is starting to look like a whole bike at last
and the list is getting smaller.




Comments
Post a Comment